Keynote speakers
Keynote speakers
|
| |
|---|---|
|
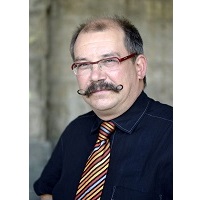
Dr. Matt Davies | The Importance of Surface Integrity in the Manufacture of Freeform Optics BIO Ph.D in Aerospace Engineering from Cornell University (1993) and then joined the Manufacturing Engineering Laboratory at NIST. He then came to the University of North Carolina at Charlotte, Center for Precision Metrology, in the spring of 2002. Dr. Davies’ research focuses on the study of applied engineering systems and the development of practical applied manufacturing and metrology solutions. In particular, his work at NIST was applied to the stability of high-speed machining processes and on the study of the complex plastic flows of material that occur in the vicinity of the tool in machining processes. He has continued this research at Charlotte where his group developed a high-bandwidth thermal imaging system that produced the highest resolution thermal images of chip formation available at the time. Dr. Davies has pursued two new research areas, metrology and mechanics for the biomedical device industry and the ultraprecision machining of complex optics. He has published several papers on the biomechanics of implants including the first papers on the mechanics of implants for the cervical spine with articulating (ball) joints, and papers on the deformation of the acetabular cup in hip implants and its implications for implant wear. He started a research group focused on the manufacture of freeform and structured optics and is the leader of the Freeform Optics Research Group. Within this group, Dr. Davies was the Director for the Center for Freeform Optics a collaborative consortium with the University of Rochester between 2015 and 2019. During that time, he helped build the Center membership to 18 non-academic members. Dr. Davies has received numerous honors and awards and has more than 75 technical publications and three patents. He is a Fellow of the Fannie and John Hertz Foundation, was awarded the United States Department of Commerce Bronze Medal in 1998, the Society of Manufacturing Engineering, John T. Parsons, Outstanding Young Manufacturing Engineer Award in 2000, the Bonnie Cone Professor for Excellence in Teaching in 2007, the Bank of America Award for Teaching Excellence in 2016 and the North Carolina Board of Governors Teaching Award in 2017. He is currently also conducting research in Adaptive Learning for the teaching of Engineering System Dynamics and has been a Fellow of the CIRP since 2009. ABSTRACT Many complex optics are manufactured by ultraprecision machining processes such as multi-axis diamond turning, diamond milling and diamond grinding. Along with computational optical design, multi-degree-of-freedom manufacturing operations and associated equipment have been a driving force behind the development of freeform optics, a disruptive technology in the optics industry. Freeform optics are optics without an axis of symmetry either on or off the optic. Freeform optics allow the nearly arbitrary redirection of light in three dimensions and therefore many axisymmetric designs can be replaced with freeform designs having improved performance or drastically reduced size and part count. Sometimes entirely new optical functions can be realized. However, freeform optics pose significant challenges for manufacturing and metrology. One of the major challenges is maintaining surface integrity using sub-aperture manufacturing methods. In this talk we discuss the effects of surface integrity on optical performance, from the effects of surface roughness and mid-spatial frequency errors to the effect of residual stresses and sub-surface damage. Metrology methods for measuring and characterizing surface integrity will also be discussed. We will give specific examples ranging from the effect of surface integrity on a freeform all-reflective imaging system to the effects of subsurface damage on transmissive infrared optics. |
|
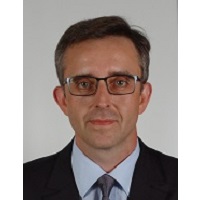
Professor Bernhard Karpuschewski | Surface integrity aspects in gear manufacturing BIO Graduated from the University of Hannover, Germany. He received his Ph.D. degree in 1995 with a thesis titled “Micromagnetic surface integrity analysis of case hardened steel workpieces” at the Institute for Production Engineering and Machine Tools (IFW), University of Hannover. From 1995 until April 1999 he worked as chief engineer of the Institute. From May 1999 until October 2000 he accepted a position as Associate Professor at the Keio University, Yokohama (Japan). Following this he was appointed as full professor for production engineering and head of the Laboratory for Production Technology and Organisation (PTO) at the Technical University of Delft (Netherlands), where he worked until March 2005. From April 2005 until August 2017 he worked as full professor for production engineering and managing director of the Institute for Production Technology and Quality Management (IFQ) at the Otto-von-Guericke-University in Magdeburg (Germany). Since September 2017 he has been professor at the University of Bremen (Germany) and director of the Division Manufacturing Technology at the Leibniz Institute for Materials Engineering IWT. Since August 2001 he has been a member of the International Academy for Production Engineering Research (CIRP) and became a fellow in 2005. He is currently Editor-in-chief of the CIRP Journal. ABSTRACT Gears are highly loaded components used in many different applications such as automotive, aircraft turbines, ships or wind energy systems. The demand on gears can be summarised by ever rising load capacity on the one hand, and significant noise reduction on the other. Both demands can only be fulfilled by adapted gear finishing processes, generating the best possible macro- and micro- geometry as well as the desired surface integrity state. This keynote presents research work analysing the thermal load on gears during gear hobbing, surface integrity states by different hard gear finishing operations and alternatives to prevent thermal damage in gear manufacturing by adapted process monitoring and fast non-destructive analysing techniques. |
| Dr. Koldo Ostolaza | Surface Integrity oriented machining; the envelope for any optimization attempt for the manufacture of failure critical components BIO Dr. Koldo Ostolaza graduated from the University of Navarra, Spain. He received his Ph.D. in 1992 with the thesis titled “Process optimization and mechanical Behaviour of Liquid Phase Sintered W-Ni-Fe alloys” at the CEIT, University of Navarra. From 1992 until 1996 he worked as a postdoc at the EU Joint Research Center for Advanced Materials in Petten-Holland. In 1996 he joined ITP where he was promoted to the position of Head of Materials & Processes Department in 2000. In that capacity he has further built his expertise in Materials and Process Technologies with a focus on materials methods of manufacture (casting, forging, sintering, powder HIP, SLM, etc.), other manufacturing technologies (machining, welding, chemical processes, coatings, etc.), and their aggregated effect upon material & component performance. He has worked with a wide variety aerospace materials such as superalloys, Ti alloys, steels. While in industry, he has kept a connection with Academia. He has been co-director of 2 PhD theses. He has participated in 12 PhD Tribunals and has contributed to 38 papers. Throughout his professional career, he has been involved in more than 30 R+T projects, and in a leadership role in 4 European projects within JTI-CS1 and CS2 calls. ABSTRACT Machining is a relevant process for component manufacture and as such, it is under the industry pressure to reduce costs while decreasing its environmental footprint. As a result, new machining technologies are coming along which keep their competitive edge to “shape” materials. In the case of failure critical components, other characteristics brought by machining play also a key role. These are captured under the generic term surface integrity, which compiles a range of characteristics such as (micror)roughness, (sub)surface damage, residual stresses etc. Their relevance relies upon their combine effect upon the fatigue and failure response engineers are looking for at the design stage. The achievement of those surface related characteristics which up to now, have been achieved following a trial-and-error approach, underpins the great potential machining technologies have alongside surface functionalization. The further exploitation of this will require doing things differently. We may need to compile and post process information we already have. We may need to generate it anew. We should challenge the basic physical understanding we have about Machining and the interactions that take place between tool and metal piece. Process modelling may help. We need the concourse of different knowledge; e.g. manufacturing, materials science, stress engineering and the inputs from IoT, data science, NDT´s etc. In the absence of a single path, some principles will be highlighted and discussed together with the potential roadmaps and expected outcomes. The journey will be rather long and should allow cashing quick wins. But this effort should also allow helping to change the perception young technologists may have about machining as a “too conventional” technology so that it can capture their intellectual attention whilst keeping its competitive edge. |
|
Professor Joel Rech | Surface integrity of parts produced by metal additive processes. BIO Joel Rech is Professor at the Ecole Nationale d’Ingénieurs de Saint-Etienne (University of Lyon). He leads a research group of 23 people working on the characterization and modelling of physical phenomena at the tool/workmaterial interface in cutting and superfinishing operations. He made remarkable breakthroughs in numerical modeling of surface integrity induced by cutting and polishing processes (residual stresses, roughness, microstructure) and in modeling of tribological phenomena (friction, wear etc.) of cutting tools. He has supervised 33 PhD theses and has published more than 250 papers that have been cited over 4500 times. He is member of the CIRP and takes part in the editorial committee of 5 international journals. He has been a member of more than 45 scientific committees of international conferences. Since 2014, he has been also Dean for Research in ENISE. ABSTRACT Additive manufacturing processes are increasingly gaining importance among mechanical industries. This new field of 3D metal printers covers a wide range of processes using various raw materials (powders, wires, compounds etc.) and different sources of energy (laser, electron beam etc.). It can be stated, however, that the surface integrity (roughness, microstructure, residual stress) of the surfaces generated by additive manufacturing differs considerably from the current state of the art produced by machining and superfinishing processes. This keynote will first aim at summarizing current developments in terms of surface integrity generated by metal additive processes. Then it will present some key finishing processes which can be applied to improve surface integrity depending on the shape of the part and the stiffness of the functional surfaces. |


